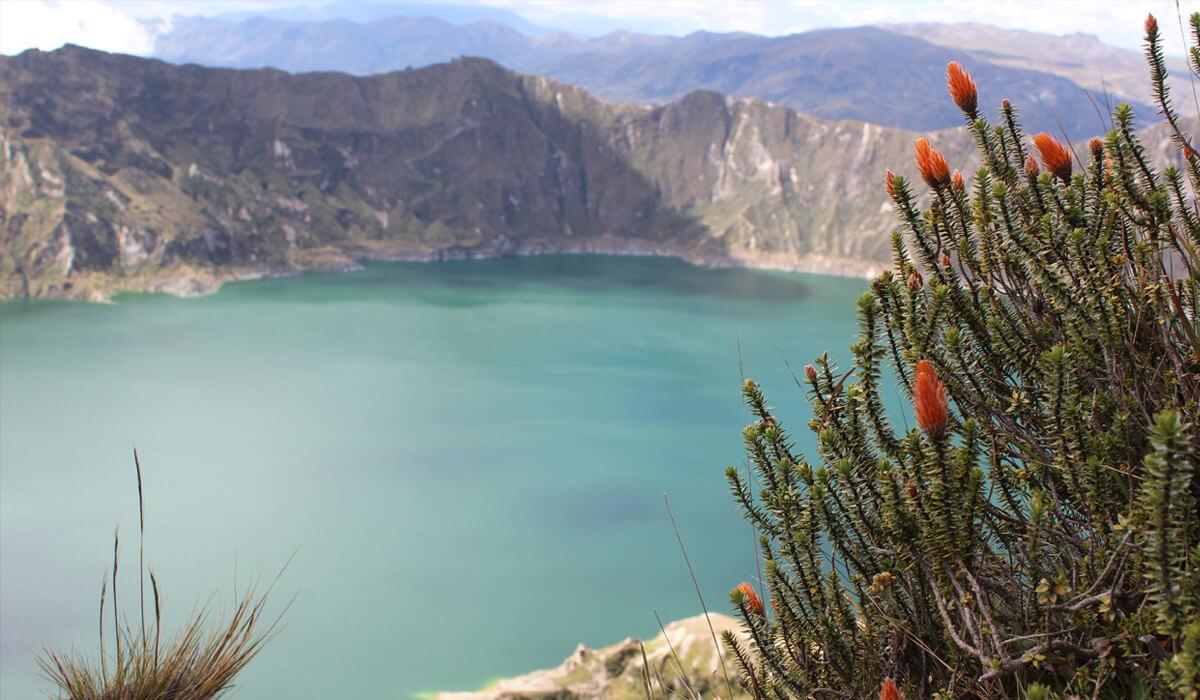
Only a 4-hour drive from Quito is one of the most stunning destinations in Ecuador: the Quilotoa Crater. Formed nearly a thousand years ago following the collapse of a volcano, this crater offers visitors a multitude of outdoor activities, among which the Quilotoa Loop Tour is the most popular.
In the following blog, we’ll give you tips on how to get to the Quilotoa Loop from Quito, and what you need to know before undertaking the journey.
How to get to the Quilotoa Loop from Quito
To get from Quito to Quilotoa (the start of this tour), you’ll likely need to pass through Latacunga first, though your route and mode of transport may vary depending on your trip plans:
Public transport
To get from Quito to Quilotoa by public transport, you’ll need to first go to the Quitumbe bus terminal, located in the south of Quito. To get to the terminal, you can either take a taxi (depending on the time of day, this can cost between $10-20 dollars) or the trolley line headed South. If you decide on the trolley, make sure you travel by day and always keep an eye on your belongings.
Quito to Quilotoa (direct)
Only one bus company in Quitumbe, “La Illinizas”, offers direct service from Quito to Quilotoa, leaving at 5:00 p.m. every day for about $3. The trip takes around 3 hours.
Quito to Latacunga
Buses leave from the Quitumbe station in Quito to Latacunga every 10 minutes and cost $2.50. The trip from Quito to Latacunga only takes about 1 hour.
Latacunga to Quilotoa Crater
Once in Latacunga, you can grab a bus straight to the crater, which takes about 2 hours for $2. The buses only leave a few times a day, starting at 9:30am. If you’re only planning on visiting Quilotoa for the day, make sure to ask the bus driver when the last bus leaves from Quilotoa, likely around 3pm.
Latacunga to Chugchilán
If you’re planning on spending the night in the area, you can take a bus to Chugchilán, a small town about 40 minutes drive from the Quilotoa crater. Chugchilán, specifically, is a great jumping off point for those that want to hike the Quilotoa Loop and have more time to explore the surroundings.
Wanderbus Ecuador
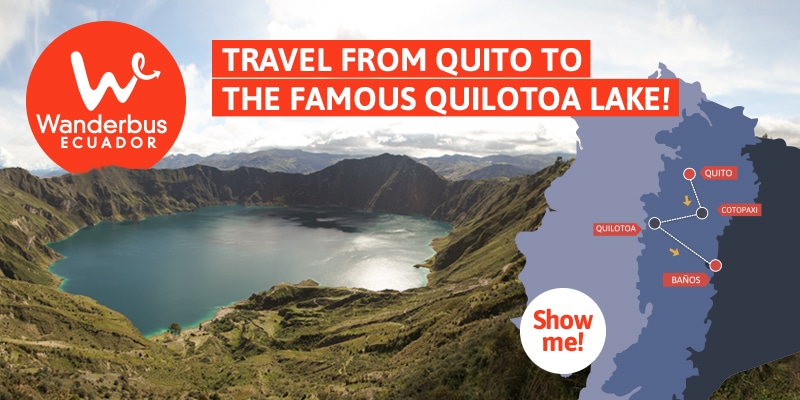
Alternatively, you can get from Quito to Quilotoa on the Wanderbus, which leaves regularly from Quito at pre-selected, convenient pick-up points. Wanderbus is an excellent option for those that don’t wish to deal with the headache of figuring out public transport and facing potential safety risks.
For instance, the Jacamar Pass goes from Quito to Baños three times a week, stopping by Cotopaxi and the Quilotoa crater on the way. If you wish to stay in the Quilotoa area for a few nights, simply hop off the Wanderbus and hop back on when it passes through a couple of days later.
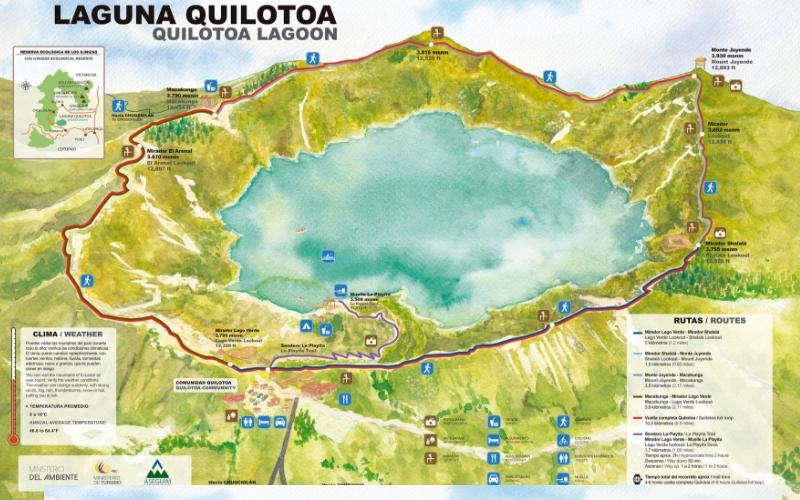
Quilotoa Loop itinerary – an overview
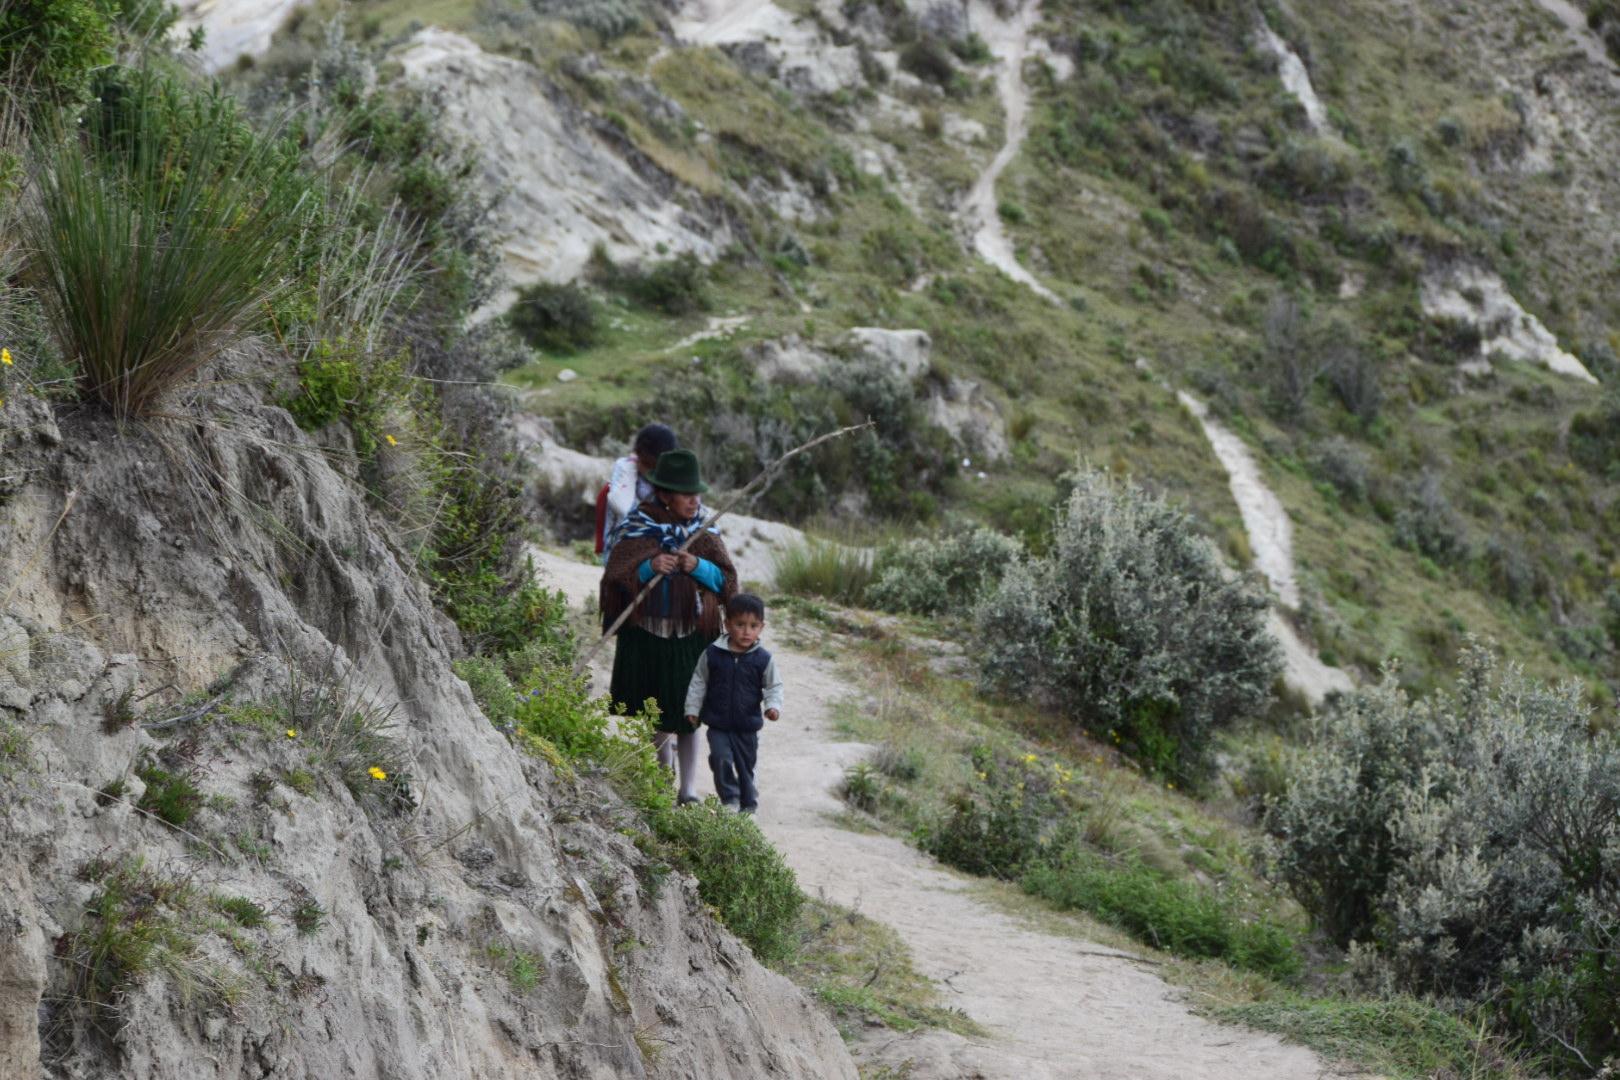
Contrary to popular belief, the Loop is not simply a hike around the rim of the Quilotoa Crater. Far from it! It is actually a customizable, multi-day trek in the region surrounding the Quilotoa crater and into/around the crater itself.
The general route for the Quilotoa Loop goes from:
Quilotoa > Chugchilán > Isinlivi > Sigchos
Many visitors like to start from Quilotoa and head north to Sigchos since the elevation decreases in this direction, which is ideal for beginners. For a more challenging trek, consider starting from Sigchos.
Depending on your level of experience and your travel plans, you can choose to only do part of the Loop in 2 days, or complete the full loop, which takes 4 days. To make the most of this trek, however, we recommend spending at least 3 days on the trail.
Please keep in mind that you may have to add a day at the beginning and end of your trip to arrive and depart the Quilotoa area.
Unlike other multi-day treks, the Quilotoa Loop doesn’t require you to bring along camping equipment. At nearly all of the small towns you’ll visit, you’ll find an affordable hostal that will also provide useful instructions (and sometimes maps) about the next leg of your journey.
Quilotoa Loop Day Trip
If you’re interested in experiencing this activity in just one day, go directly to the Quilotoa Crater. You’ll have enough time to explore the crater and grab a bite to eat at a restaurant nearby.
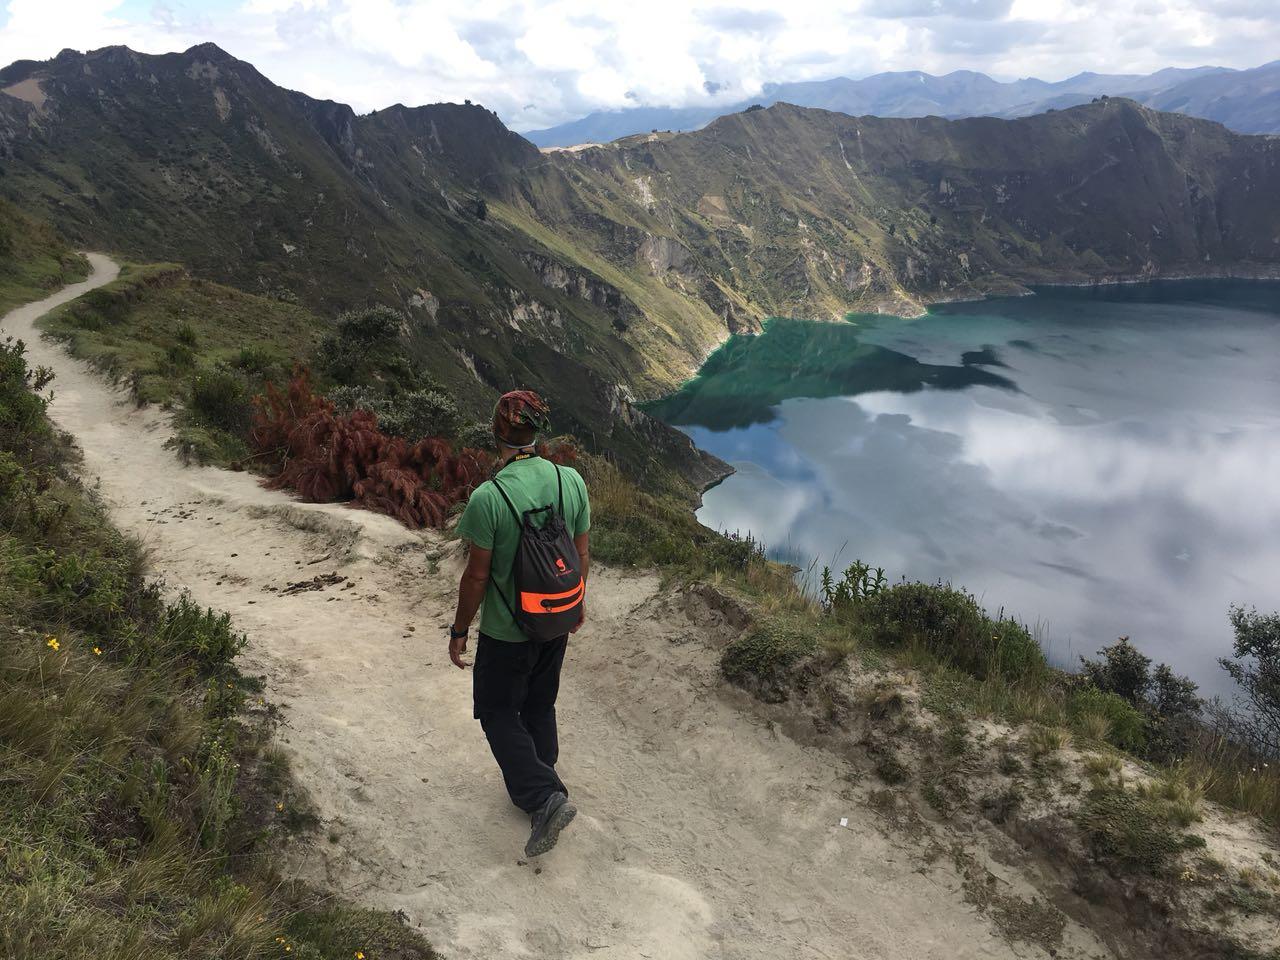
Hike around Quilotoa crater
This hike takes you around the rim of the crater, providing incredible views of the crater itself and the surrounding landscape. This is a relatively easy hike, though there are a few narrow spots, and takes about 6-8 hours to complete, depending on your level of fitness and pace.
Hike into the crater
This downhill trek will take you right up the the turquoise waters of Quilotoa lake, where you can rent a canoe for an hour or more and explore this eerie, beautiful place. At over 4,000 meters in altitude (13,000 feet), the hike back up the crater is quite challenging. If you don’t think you’ll manage, you can always hitch a ride up the crater on a donkey.
Quilotoa Loop 2 days – Quilotoa to Chugchilán
If you only have 2 days to do the Quilotoa Loop, we suggest you try not to cram too many activities into each day.
On Day 1, do either of the suggested hikes from the previous section in and around the Quilotoa Crater. That night, stay at one of the hostels near the crater.
On Day 2, start early and begin your hike to the town of Chugchilán. The hike will take you 5 – 7 hours to complete. To read more about this segment of the hike.
Quilotoa Loop 3 days – Quilotoa to Chugchilán to Isinlivi
Doing the Loop over 3 days gives you a chance to visit a few more towns in the area and, because you’d be starting from Quilotoa and hiking downhill, this trek isn’t strenuous. To read more about each of the segments of the hike, jump down to the Complete SECTION.
- On Day 1, hike the 4-6 hours from Quilotoa to Chugchilán.
- On Day 2, hike the 4-6 hours it takes from Chugchilán to Isinlivi.
- On Day 3, hike the final 3-4 hours from Isinlivi to Sigchos, your final destination.
Complete Quilotoa Loop 4 days – Quilotoa to Chugchilán to Isinlivi to Sigchos
The complete Quilotoa Loop takes at least 4 days, depending on how much time you want to spend in each area, and depending on your pace.
Quilotoa – Chugchilan
The trail that takes you between these two towns (11.8 km / 7.33 miles) is one of the most beautiful day hikes in all of Ecuador. Depending on your fitness level, this hike takes between 4 to 6 hours.
At the beginning of the trail, you’ll hike around the rim of Quilotoa’s volcanic crater lake for about one hour. Then, you head down into the valley to arrive at the town of Guayama. During this part of the trail, you’ll enter a canyon and cross the Shihui River at 2,800 mts (9,200 ft). The final stretch involves ascending the canyon for at least one hour until you arrive to Chugchilán. While this hike isn’t extremely challenging, pay close attention to the route and, as always, the weather.
This hike is mostly downhill; however, the final stretch is steep and challenging. It also can be difficult to find the route, especially if the weather is cloudy. There aren’t many signs along the trail, so if in doubt, ask for detailed instructions from your hostal and if they have a map, that’s even better.
Please note that doing this hike in reverse (Chugchilán to Quilotoa) is far more challenging and mostly uphill, taking at least another couple of hours to complete.
Make sure that you have enough time to complete the hike before the afternoon weather moves in; never leave Quilotoa after 1:30 p.m. If you’re hesitant about doing the hike yourself, hire a local guide for $15-20.
- Total hiking distance: 11.8 km (7.33 miles)
- Hiking distance Quilotoa – Guayama San Pedro: 5.2 km (3.23 miles)
- Hiking distance Guayama San Pedro – Chugchilan: 6.6 km (4 miles)
- Hiking time (including stops): 5 – 6 hours
- Altitude Lake Quilotoa: 3914 mts (12,841 ft)
- Altitude Guayama San Pedro: 3,260 mts (10,800 ft)
- Altitude canyon (lowest point): 2,800 mts (9,200 ft)
- Altitude Chugchilán: 3,200 mts (10,500 ft)
- Chugchilan – Isinlivi
The distance between these two towns is 12km (7.46 miles), resulting in a hike of about 4 to 6 hours in duration. There aren’t many signs along the trail, so ask your hostal for instructions or a map.
To start this trail, you’ll need to head out of Chugchilan on the road going towards Sigchos. After about 30 minutes, you’ll see a road on your left going past the cheese factory. Pass this and continue walking until you see a white house with a wooden sign. You’ll see a grassy trail going down on the right. Follow this trail to the first houses of Chinalo. Remember you will have to pass the small villages of Chinalo, Itualo, and the Toachi River. From here, follow the trail onwards, following the instructions provided by your hostel. Never hesitate to ask the locals for directions as well!
Isinlivi – Sigchos
The distance between these two towns is 14km (8.7 miles) and this route is relatively well-marked; there are numerous signposts and spray-painted colors. The trail remains flat, for the most part, and the complete hike takes around 3 to 4 hours.
On this trail, you’ll descend 441 mts (1446 ft) and climb 497 mts (1632 ft). From Llullu Lama, head left and take the first big grassy trail going down to the right. Follow this trail going straight at the crossing – down to a little stream, cross it and follow track up to the road. Follow this road for about 10 minutes. Just before you come to some tall eucalyptus trees, take the grassy track heading down to the left, which leads to the small community of Cochalo de Isinlivi. From here you will have to follow the trail and, thanks to efforts by the Cloud Forest Hostel, it’s possible to find yellow and red signs that indicate the way to Sigchos or Isinlivi.
Nonetheless, make sure to confirm the route regularly with the locals and follow the instructions that the hostel has given you. This is a windy trail that follow a road with very few vehicles.
There is a bus leaving Sigchos back to Latacunga at 2:30 pm each day. There are usually other buses at 1:30pm and 4:00pm.
Quilotoa Loop weather:
The Ecuadorian Andes have two seasons: dry and wet. The dry season takes place between June, July, and August. During this time, mornings are usually clear and sunny, however you have to consider that the weather in the mountains can change quickly. Be prepared for all types of weather during the dry season! Due to the altitude of the Quilotoa Loop, the temperatures in most towns range from 0°(32F) to 16°(60F).
Quilotoa Loop checklist / packing list
- Travel light – leave your luggage and other unnecessary possessions with a hostel at the start of your trek.
- Cash – the last ATM you’ll come across will be in Latacunga, and many of the hostels in the Quilotoa area don’t accept credit or debit cards. Make sure to take out enough cash for your trip and keep it in a secure place.
- Shoes and socks – bring a reliable pair of shoes and socks, preferably waterproof hiking boots and wick dry socks, and sandals to wear when not hiking
- Sun protection – hat, sunglasses, sunblock, chapstick/lip salve
- Water – carry at least 1 liters of water with you at all times
- First aid kit
- Flashlight/headlamp
- Water protection for backpack
- Windbreaker and rainproof jacket
- Layers for the cold (fleece, under armor, gloves, hat)
- Swimsuit (there are jacuzzis at some hostels and you never know when you’ll want to jump into a river!)
- Toilet paper isn’t always available in public toilets. Make sure to have some handy!
- Snacks: trail mix, cookies, chips/crisps, tuna, wraps, chocolate, sandwiches, etc.
Quilotoa Loop route
You may be wondering why this route is called a loop when in fact it doesn’t circle back to the trailhead. One popular version of the route loops hack from/to Isinlivi along a different route via the village of Malingua Pamba. However, many tourists end up starting from Quilotoa, and due to time constraints, don’t loop back and instead end in Sigchos.
That said, the Quilotoa Loop is highly customizable and there’s no wrong way to go about it. If you search for more details online, you’ll be overwhelmed with the various itineraries that exist and the scarcity of clear maps. It’s important to remain flexible and, while hiking, confirm the route regularly with the locals and follow the instructions that your hostel has given you.
In terms of elevation, as mentioned earlier, the route from Sigchos to Quilotoa is uphill and significantly more demanding.
Conclusion
For the hikers among you that wish to explore some of the Ecuadorian Andes on foot, the Quilotoa Loop is an adventure you can’t pass up!
As you plan your trip, remember to give yourself enough time to see more than just the crater, as the neighboring towns and landscapes around Quilotoa are spectacular. Also, in getting to Quilotoa, consider your mode of transport and choose an option that won’t add unneeded stress to your trip.
If you’re traveling down on the Wanderbus, our guides will provide information on routes to take and the best hostels in each town. Since other like-minded trekkers may also be on the bus, you might find a small group to travel with as well!
Are you ready to begin your journey to Quilotoa? Make a reservation with Wanderbus Ecuador today.